- HubPages»
- Travel and Places»
- Visiting Africa»
- Travel to Southern Africa
Kipling's "If" and Pretoria's Four Forts


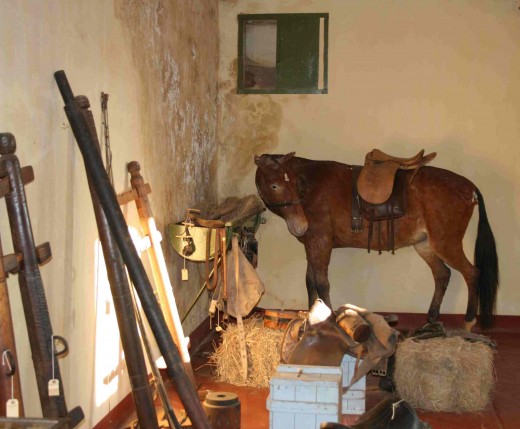
Boot and saddle
On a hot and dusty Sunday afternoon (makes a change from “a dark and stormy night”, doesn't it?!), 29 December 1895, in the temporary military camp at Pitsane, Bechuanaland (now Botswana). Dr Leander Starr Jameson, right hand man to arch-imperialist Cecil John Rhodes, paced up and down, weighing his options.
He had under his command some 600 troops of Rhodes's Chartered Company, mostly from Rhodes's colony Rhodesia (now Zimbabwe).
His options were to either stay put or to lead his troops into the Transvaal (Zuid Afrikaansche Republiek) of President Paul Kruger, in support of a potential uprising of the “Uitlanders” (Foreigners), mostly British subjects, who had been attracted by the lure of the gold “in them thar hills” in Kruger's republic.
The cause of the supposed uprising was the alleged mistreatment and disenfranchisement of the “Uitlanders” by the Boer government, which according to Rhodes's propaganda, was intolerable: “Thousands of unarmed men, women and children of our race will be at the mercy of well armed Boers ...” read a letter purporting to come from the so-called “Reform Committee” of the Uitlanders in Johannesburg. This committee was in fact a creation of Rhodes and the letter, which Jameson read to the troops that afternoon, was supposedly an invitation to Rhodes to send troops into the Transvaal to overthrow the Boer government.
In the days prior to the Sunday afternoon Jameson had received numerous reports from Johannesburg saying that the uprising was not about to happen. The Uitlanders were not ready to revolt against the Boer government.
“Boot and saddle,” came Jameson's order that fateful Sunday afternoon. He was going in, despite the ominous portents of failure, and despite orders to the contrary.
For four days Jameson's little column of men rode into the Transvaal. For the last two days of the four they were constantly under attack. Not one armed Uitlander rode out to join them and at last, at 8.00 p.m. the troops hoisted a white flag near Krugersdorp, to the west of Johannesburg, and the failure of what came to be known as the “Jameson Raid” was confirmed. Jameson had lost sixteen men, the Boers one, and the outcome was total humiliation. A weeping Jameson was taken off to jail in Pretoria.
The British government lost no time in repudiating the Raid and Rhodes had to resign as Prime Minister of the Cape.
"If..." by Rudyard Kipling
If you can keep your head when all about you
Are losing theirs and blaming it on you;
If you can trust yourself when all men doubt you,
But make allowance for their doubting too;
If you can wait and not be tired by waiting,
Or, being lied about, don't deal in lies,
Or, being hated, don't give way to hating,
And yet don't look too good, nor talk too wise;
If you can talk with crowds and keep your virtue,
Or walk with kings - nor lose the common touch;
If neither foes nor loving friends can hurt you;
If all men count with you, but none too much;
If you can fill the unforgiving minute
With sixty seconds' worth of distance run -
Yours is the Earth and everything that's in it,
And - which is more - you'll be a Man my son!
(The full text of this poem can be found here)
A literary aside
What many people might not know, even those who really like the poem, is that Rudyard Kipling's famous verse "If" was inspired by Jameson's stoic acceptance of the consequences of his unsuccessful raid. In his autobiography Something of Myself (1937) Kipling wrote about this poem:
"Among the verses in Rewards was one set called 'If----', which escaped from the book, and for a while ran about the world. They were drawn from Jameson's character, and contained counsels of perfection most easy to give. Once started, the mechanisation of the age made them snowball themselves in a way that startled me. Schools, and places where they teach, took them for the suffering Young--which did me no good with the Young when I met them later. ('Why did you write that stuff? I've had to write it out twice as an impot.') They were printed as cards to hang up in offices and bedrooms; illuminated text-wise and anthologised to weariness. Twenty-seven of the Nations of the Earth translated them into their seven-and-twenty tongues, and printed them on every sort of fabric."
The first and last stanzas shown in the box at right.

. The three German-designed forts all have basically the same shape. Fort Daspoortrand is quite different. Image from \"The Military Fortifications of Pretoria 1880 - 1902\" by Anton C. Van Vollenhoven")

. The three German-designed forts all have basically the same shape. Fort Daspoortrand is quite different. Image from \"The Military Fortifications of Pretoria 1880 - 1902\" by Anton C. Van Vollenhoven")
Reaction in Pretoria
In Pretoria the government was stung into action by the raid. A number of covert actions planned and prepared against the government of the ZAR came to light and the need to prepare for a potential attack was clear.
A former French artilleryman, Leon Grunberg, suggested to the government the urgent need for a defensive plan for Pretoria. A plan was drafted by Grunberg This plan was not acceptable to the government, which preferred a plan proposed by two German engineers, Otto Albert von Dewitz and Heinrich C. Werner which envisaged eight forts. President Kruger approved the plan on 16 March 1896.
Commandant-General P.J. Joubert was put in charge of a Construction Commission to oversee the construction of the forts. The Commission was disbanded in 1899 when only four of the forts had been built.
Three of the forts were designed by the two German engineers and the fourth fort followed the design of Grunberg. German construction company Krupp was contracted to build three of the forts – Fort Wonderboompoort, Fort Klapperkop and Fort Schanskop. The fourth fort, Fort Daspoortrand (also known as West Fort), was constructed by Leon Grunberg and another French military engineer, Sam Leon. The German-built forts all followed basically the same design, while the Daspoortrand fort was quite different.
In the event not a single shot was fired in action from any of these forts. By the time of the Boer War when Lord Roberts attacked Pretoria on 5 June 1900 the ZAR Government had already disarmed the forts.
Once Pretoria had been taken by the British forces the forts were fully garrisoned and armed by the British Army.
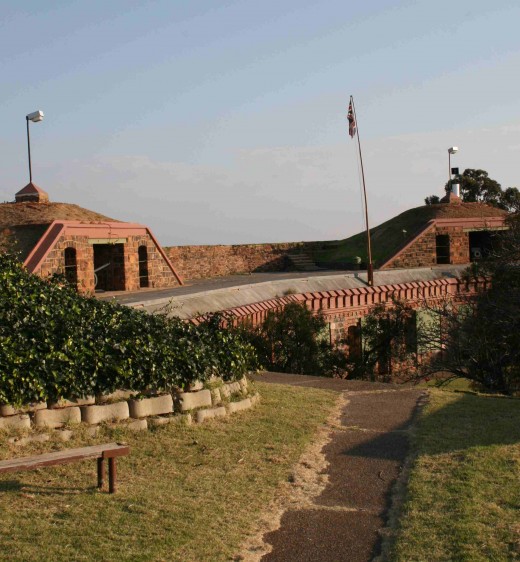
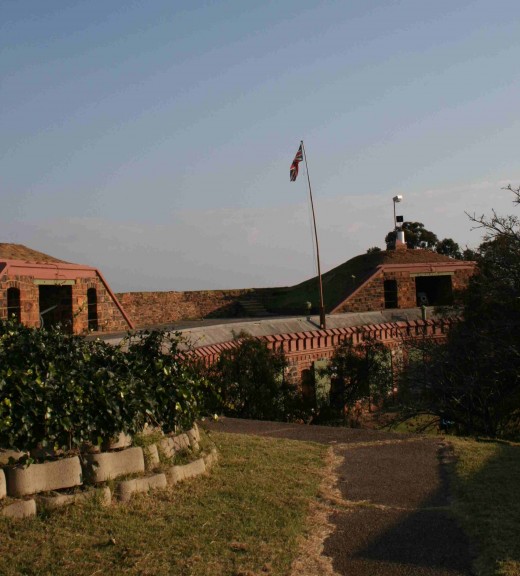
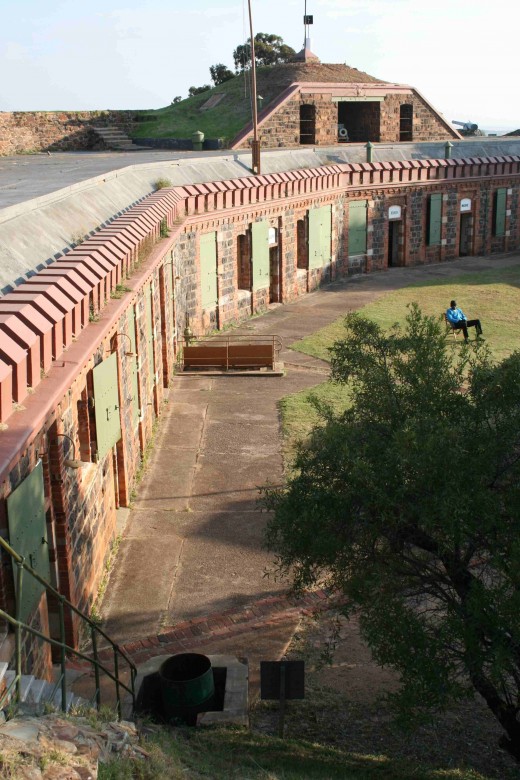
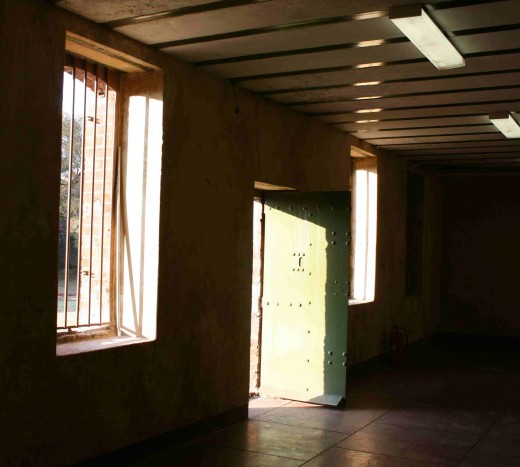
Scenes from Fort Schanskop
Click thumbnail to view full-size


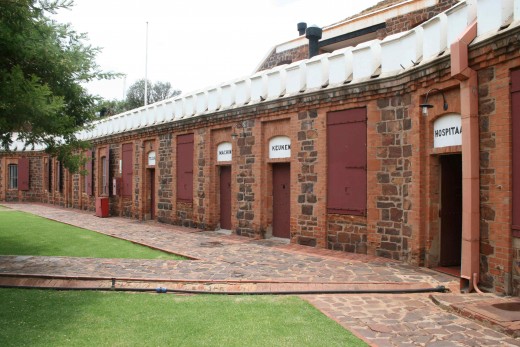

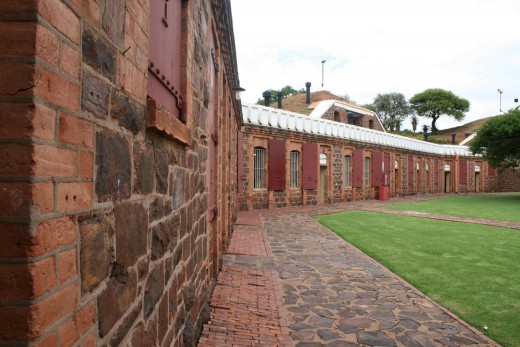


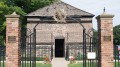
Fort Schanskop
Fort Schanskop was the first of the four forts to be completed. The fort was handed over to the ZAR military on 6 April 1897 and cost £47500 to build. President Kruger came the next day to inspect the fort.
By September of that year the fort was armed with a Martini-Henry and two 37mm Maxim-Nordenfelt quick firing guns. By 1899 a "Long Tom" had been added, though in October 1899 some guns had been removed and only one Maxim-Nordenfelt and one Martini-Henry remained.
The garrison was originally of 30 men under the command of Lieutenant A. Cariblom, but by October 1899 the garrison had been reduced to just 17 men. By the time the British took Pretoria in June 1900 there were no soldiers at Schanskop.
The fort had communications with the other forts in Pretoria and Johannesburg by means of overhead telegraph and heliograph. There was also a telephone, as at the other forts.
The fort has been very beautifully restored and is now a museum.
Scenes from Fort Wonderboompoort
Click thumbnail to view full-size


Fort Wonderboompoort
The second of the four forts to be taken into use by the ZAR was Fort Wonderboompoort on the ridge above where the Wonderboom Nature Reserve is now. This fort was built at a cost of £49000 and was handed over to President Kruger on 4 September 1897.
The officer in charge of the fort was Lieutenant J. Wolmarans.
The fort was armed in August 1899 with a “Long Tom” canon, and in October of the same year with a 37mm Maxim-Nordfeldt and a Martini-Henry hand maxim.
Like the other forts this fort was connected by telegraph to the Commandant General's office.
Water was pumped from the nearby Apies River and stored in a reservoir under the rooms of the fort.
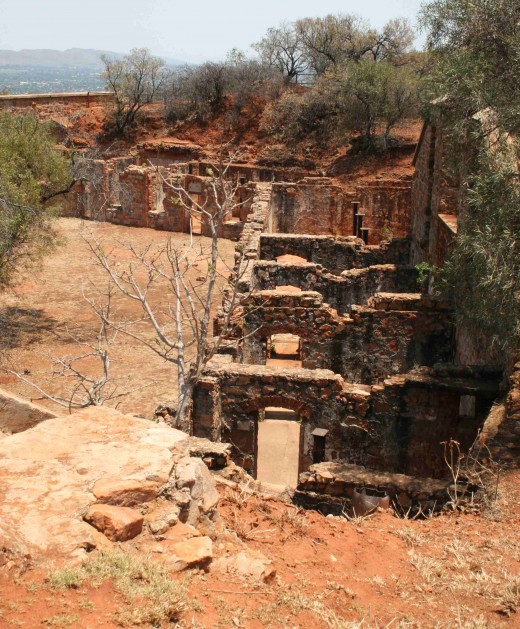
The fort is now derelict, having been dismantled during the Second World War. See the section “The Mystery of the Forts”.
Scenes from Fort Klapperkop
Click thumbnail to view full-size
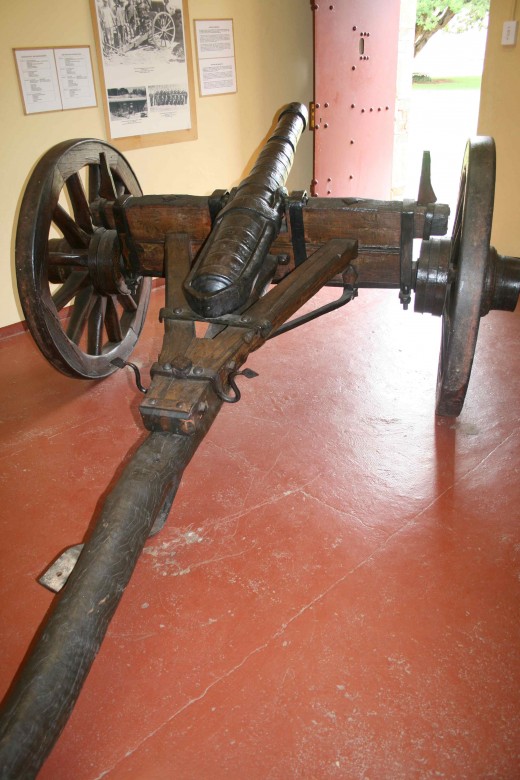
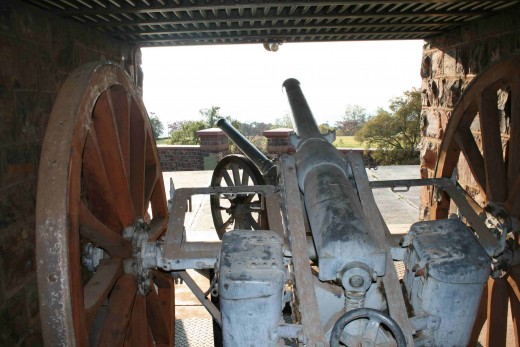
 and a 60 mm Armstrong cannon behind it.")


, national flag of the ZAR.")


 and a 60 mm Armstrong cannon behind it.")


, national flag of the ZAR.")


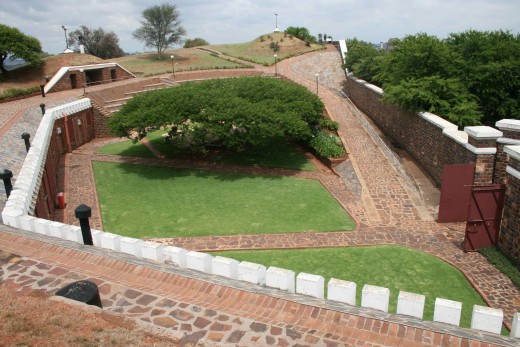
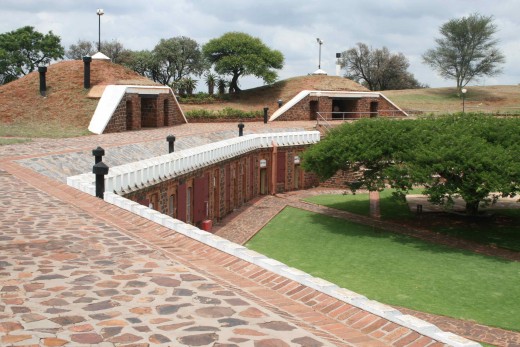
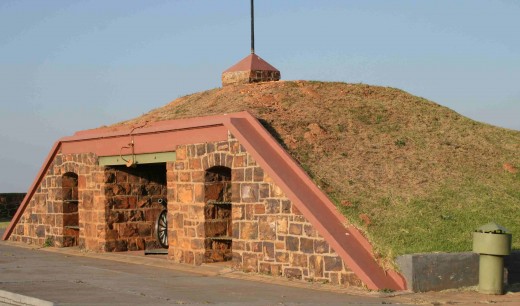
Fort Klapperkop
Fort Klapperkop was built at a cost of £50000 and was handed over to the government of the ZAR on 18 January 1898. Included in the fort was the Central Magazine, also handed over that day.
By the following January the fort was manned by 17 troops, increased to 30 six months later. Only three months later the number had been reduced to 16.
By October 1899 the armaments of the fort included a “Long Tom”, a 37mm Maxim-Nordenfelt and three Martini-Henry hand-maxims.
The “Long Tom” was sent to Ladysmith (Natal) by train to assist the Boer forces there. A 65mm Krupp mountain gun was the only armament left at the fort, with two Martini-Henrys, by 7 November 1899.
The fort had a reservoir under its room fed from the Fountains Valley some distance away.
Communications with the outside world were by means of heliographic and overhead telegraphic links as well as telephone.
The fort had electric power supplied by a paraffin engine and generator.
Unlike the other Pretoria forts Klapperkop had a moat and drawbridge, though the moat seems never to have been filled.
The fort is now a museum with some well-planned displays.


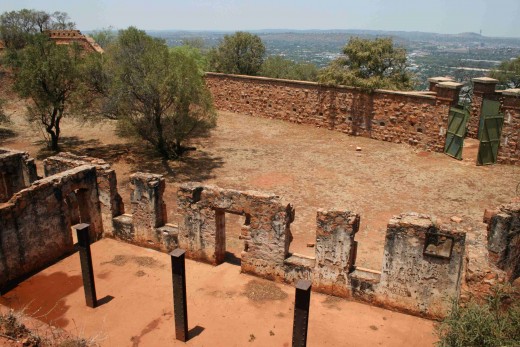
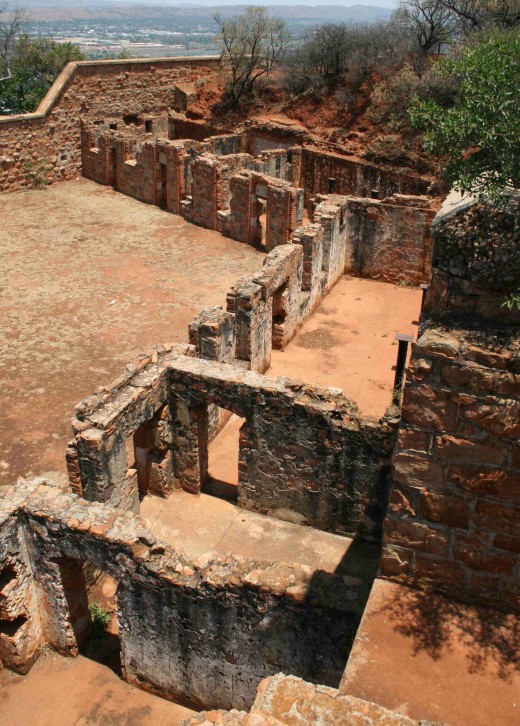
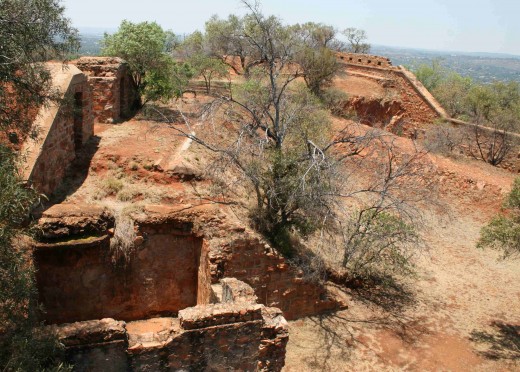
Fort Daspoortrand
This is the only fort I have not as yet visited. It is also the only one designed by the two French engineers Leon Grunberg and Sam Leon.
The fort was handed over to the ZAR government on 12 November 1898. The cost of the fort had been £46500.
By October 1899 the fort was supplied with a “Long Tom”, two 37mm Maxim-Nordfelt guns. There were at that time 20 men stationed in the fort, though this was later increased to 25 (see photo of the garrison). The Officer in Charge was Lieutenant F. Townsend.
The fort was in telegraphic communication with the central telegraph office in Pretoria, and had a telephone.
There were two dynamos supplying electrical power to the fort and two searchlights.
Since the mid-1980s considerable archaeological research has been done on this fort, but it has not been restored as Forts Schanskop and Klapperkop have been.


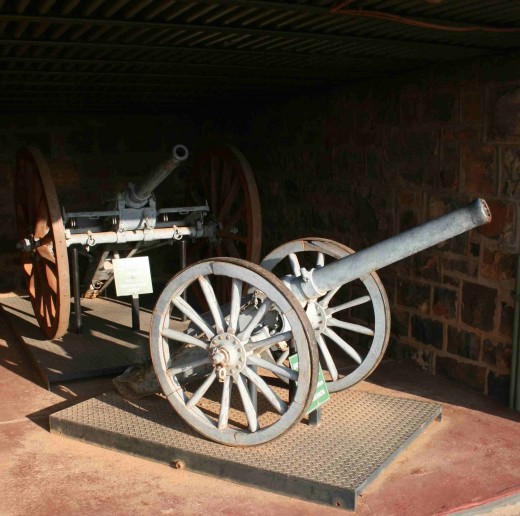
The Creusot "Long Toms"
With the clouds of war gathering strength on their horizon the government of the ZAR decided in 1897 to increase its firepower by the purchase of big field guns. They looked to Schneider et Cie in Le Creusot, France, and from them bought four 155mm field guns and 4000 rounds of ammunition at as cost of £62850.
The length of the gun barrels quickly gained them the nickname “Long Tom”. The barrels of the guns measured 4.2 metres and each weighed 2500 kilograms.
These guns were far superior to anything the British had in South Africa at the time and as a result they were prime objectives of the British forces. Kitchener ordered that “these guns must be conquered at the first moment.”
The Boers, of course, were equally determined that the guns should not fall into British hands, and General Louis Botha ordered that the guns be dynamited when capture seemed likely.
One of the guns was damaged by British soldiers who stuffed the end of the barrel with explosives and to set them off. This incident happened on 8 December 1899. As a result French technicians shortened the barrel, which was then immediately nicknamed “Die Jood (The Jew)” by the Boers soldiers.
None of the guns survived the Boer War complete, as each was dynamited as its ammunition ran out.
.")
The mystery of the forts
Early in World War II the Daspoortrand and Wonderboompoort forts were apparently destroyed. A legend developed that they had been blown up on the orders of the then Prime Minister of South Africa, General Jan Smuts, in order to prevent them being used by dissident pro-German members of the Ossewa Brandwag movement. This movement employed sabotage to try to hamper South Africa's contribution to the Allies in the war.
In an interesting article in the South African Military History Journal (Vol 13 No 1) writer D.C. Panagos writes, “the writer believes that these allegations can be dismissed out of hand.”
“Considering the highly charged state of emotion between the parties in 1938/39, it seems unlikely that Smuts, known as 'slim Jannie', would have done something of the sort, which would only have made matters worse,” Panagos concluded.
What did happen to the forts, then?
His investigations of the ruins show that the forts were dismantled rather than blown up. He bases his conclusions on the fact that the steel used in the construction of the forts was mostly removed and that certain structures within the forts show no signs of dynamiting.
Steel was used in large quantities in the construction of the forts, and a considerable amount of it could have been recovered when the forts were dismantled.
“Who would want high-grade steel in such quantities?” asks Panagos in the article. His conclusion, “...it is significant that the two forts were dismantled at some point between 1940 and the end of the Second World War in 1945. It was during this period that the armaments industry of the Union of South Africa was born. In addition to thousands of armoured cars, the Union also produced 100 2-pounder antitank guns, 330 6-pounder antitank guns, and 391 3,7-inch field howitzers.”
Something of an irony that the forts meant to protect the ZAR from the British might eventually have assisted the Allies.
Sources
Grobler, D.C. (1984): Die Long Tom-kanonne. Joahnnesburg: Federasie van Rapportryerskorpse.
Malherbe, V.C. (1971): What they said. Cape Town: Maskew Miller.
Pakenham, Thomas (1979): The Boer War. Johannesburg: Jonathan Ball.
Panagos, D.C. (2004): The mystery of the ZAR forts of Pretoria. Military History Journal, Volume 13, No. 1.
Van Vollenhoven, Anton C. (1998): The Military Fortifications of Pretoria 1880 - 1902. Pretoria: Technikon Pretoria.
Copyright notice
The text and all images on this page, unless otherwise indicated, are by Tony McGregor who hereby asserts his copyright on the material. Should you wish to use any of the text or images feel free to do so with proper attribution and, if possible, a link back to this page. Thank you.
© Tony McGregor 2010